To create a new page, go to: Pages > Add New
To edit an existing page, go to: Pages > find the page you’d like to edit > Edit
Enter a title in the field that says “Add Title.” This will be the administration title for your page. It will also be used as the H1 for your hero page block unless the content is overwritten in the hero page block.
Edit the permalink field under the title field to change the URL for the page. The Parent Page can be assigned under “Page Attributes” in the right hand sidebar.
If you assign a page to a parent page it will change the URL structure of the page.
EXAMPLE: If “Our Values” is assigned to “Home” its URL will change from looking like this: www.(your site).com/our-values/ To looking like this: www.(your site).com/about/our-values/
NOTE: If your parent page is included in any menu you now want to navigate to Appearance > Menus. See menus below for further instructions.
WATCH: How to Write and Add Title Tags & Meta Descriptions to Pages and Posts in WordPress
Scroll to the bottom of the page to the “Yoast SEO” section. Here you should see options to edit the SEO title and meta description.
NOTE: For consistency, we recommend leaving in the “Separator” and “Site Title” variables in the SEO title field.

There are three ways to hide pages in WordPress — hiding the page from the sitemap, setting a page as a draft, and deleting a page completely.
To enable the Elementor builder: Click on the blue “Edit with Elementor” button
Once your page is set up, and the Elementor builder is on, you can begin adding in page blocks to build out the page. Refer to the Page Block Library for all of your page block options.
Entering content into the content editor:
Once your copy is in the WYSIWYG, you can continue to style the copy as needed. There are a few tools at your disposal to do this. To see all content styles available on your site, check out your Content Styles page.
NOTE: When applying header text to your content, keep accessibility in mind.
WATCH: How to apply accessible header styles
NOTE: WYSIWYG stands for “What You See Is What You Get”
To edit menus, go to Appearance > Menus
Go to the “Select a menu to edit:” dropdown, and pick the menu you want to edit. This will take you to the menu editor which you can use to organize, nest, and rearrange how you want your pages to display in your menus.
NOTE: The social media menu in the footer is in a different location. See below.
NOTE: If a field you’re expecting to see in WordPress is not visible to you, it might be hidden under Screen Options. Go to “Screen Options” in the upper right corner of your screen, make sure that the field you want to see is selected. Close out of “Screen Options” and the field should now be visible.
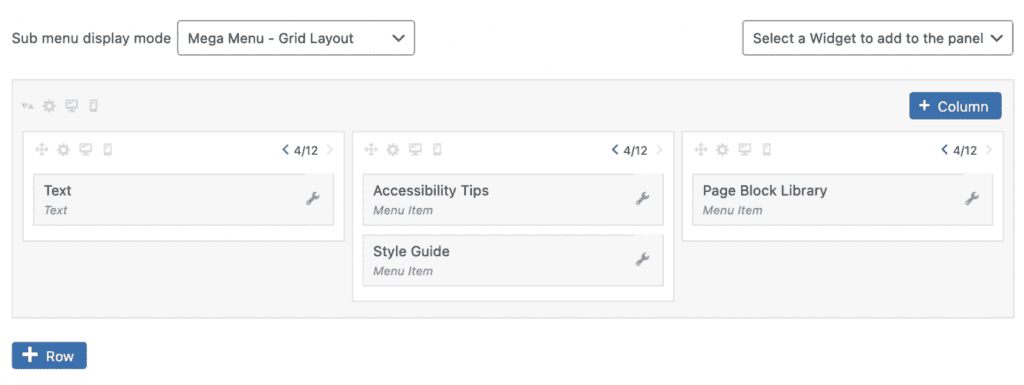
To edit the mega menus, go to: Appearance > Menus > filter for Primary Menu
NOTE: The layout of pages that you place in this view is going to be the way these pages/links appear in the menus on mobile devices.
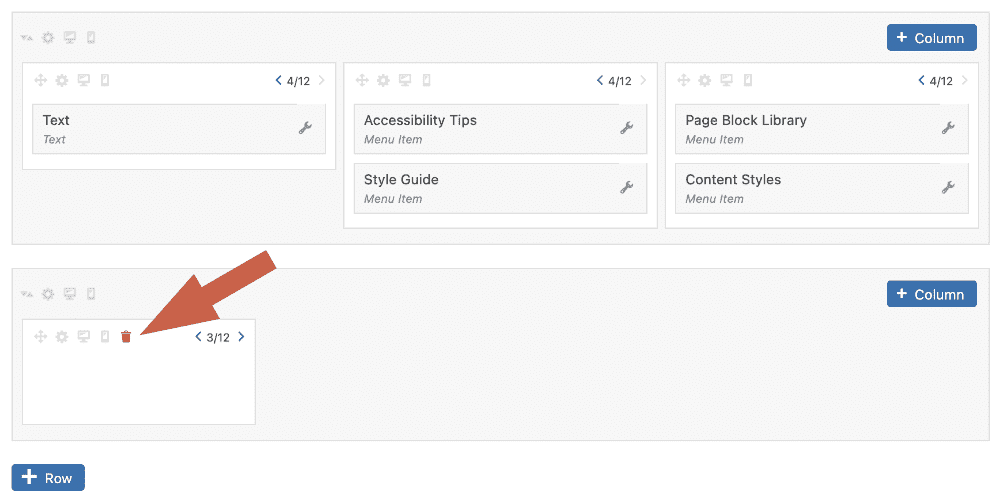
NOTE: If you decide to add a page to a Mega Menu later, you will see it added in a separate bottom row. Drag and drop that page into the desired column and remove the now empty row by hitting the red trash can in the white and gray sections.
The menu items on your site use the following CSS classes to change how they are displayed to the user:
Question: What happens to the pages in a menu if I delete a page?
When a page (or any other post type detail page) is deleted, it will disappear from the menus entirely. The next time you navigate to Appearance > Menus, you will see this page in its original spot in the menus, highlighted in red.
Question: What happens to the pages in a menu if I change a page’s URL?
If you update a page’s URL, it will update automatically within the menus to match the new URL. This happens because WordPress’s menus use page ID to add pages to menus instead of just the URL. If a page has been added as a custom link instead of as a page, the URL will be broken in the menu.